How to announce and manage a training course in the Bio-IT website
The Bio-IT website includes courses announcements not only from Bio-IT, but from various EMBL entities including the EMBL centers and ALMF. Would you also like to know how to announce a course and manage the related registrations and communication through our website? Here’s a short overview for you!
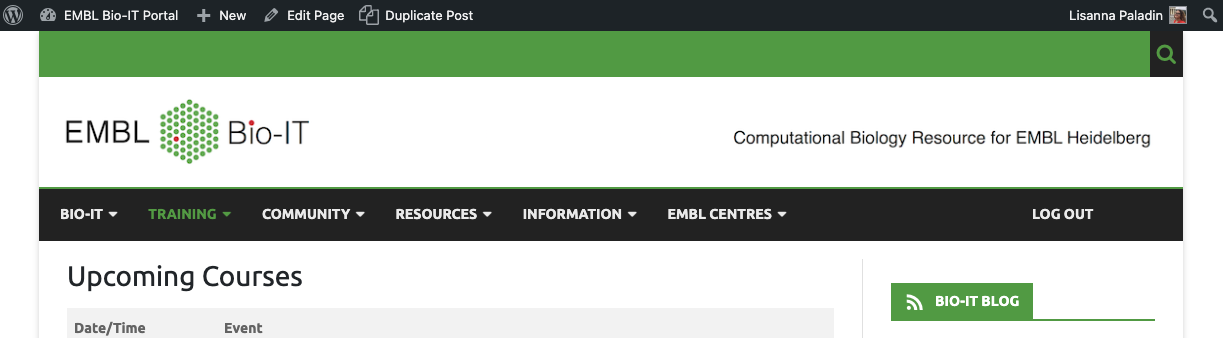
Upcoming courses in the Bio-IT website
The page available at bio-it.embl.de/upcoming-courses includes two lists. The Upcoming courses on top shows courses planned with a date and time, while you can consider the Training plan on the bottom our wishlist of courses we are planning or would like to organise in the future. If you are interested in contributing to any upcoming or desired course, feel free to reach out to us at bio-it@embl.de.
But let’s say the course you would like to organise is neither listed umong Upcoming corses nor in the Training plan… what do you do?
First, you check if you have Editing access to the Bio-IT website. You do if at the bottom of any page you see a little Edit button, or if you see the black toolbar on top. If you don’t, feel free to ask it to us. If you do, let’s start from there.
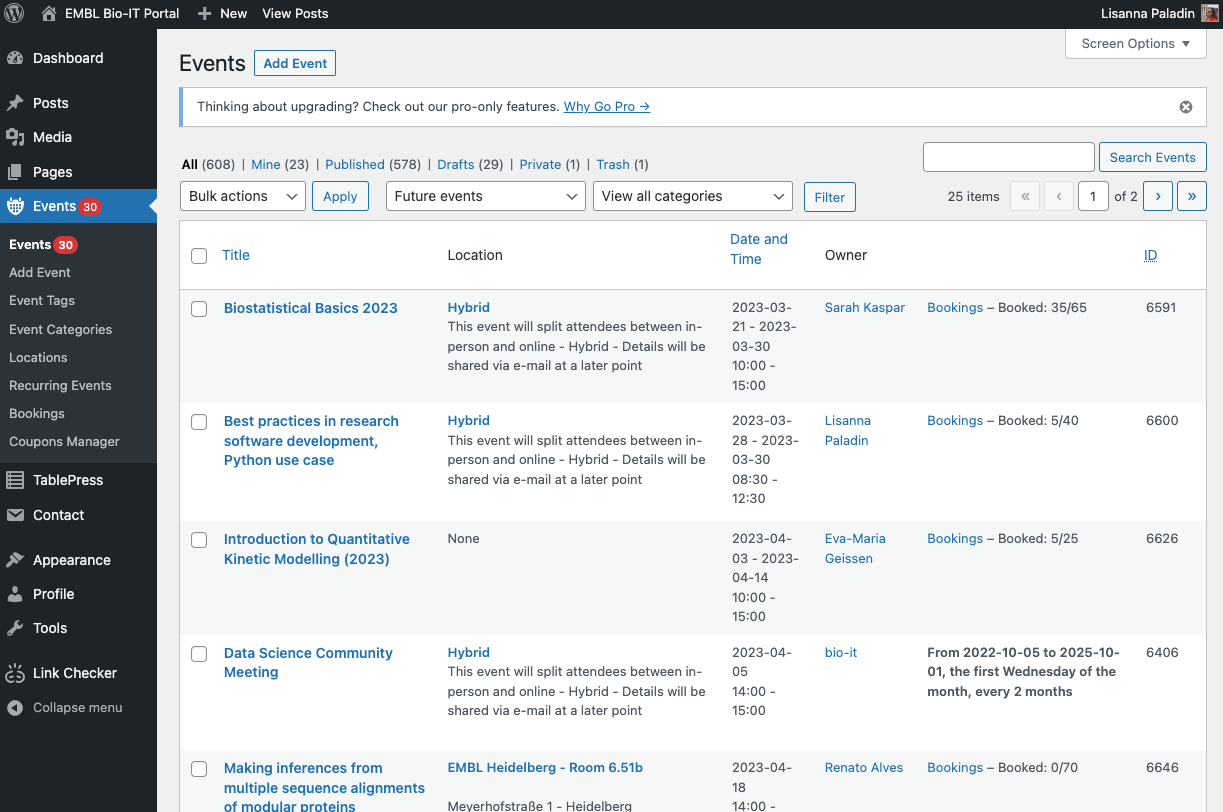
In the toolbar, click on the second button from the left to access the EMBL Bio-IT Portal Dashboard. The dashboard includes several sub-menus, in this post we will focus on the one to manage events, namely the Events menu.
Duplicating an event
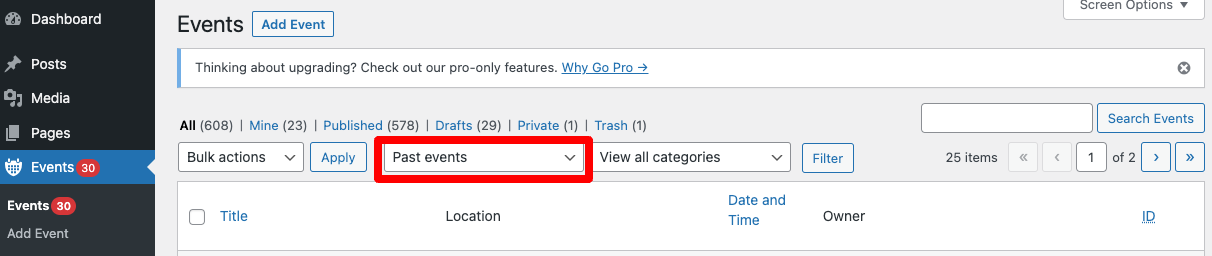
If what you would like to organise is a new iteration of a course that already happened in the past, it would be probably be quicker to duplicate the previous event and start from there. To view past courses, please select the Past events option from the second dropdown available on top of the events table.
The Duplicate option will appear by hovering with your mouse over the title of any event. Clicking this will create a new event announcement draft, with the same data of the original event. Please notice: this will copy also the dates and the booking cut-off date. Edit them before publishing the course, or it will not be visible in the list of future events.
Creating a new event
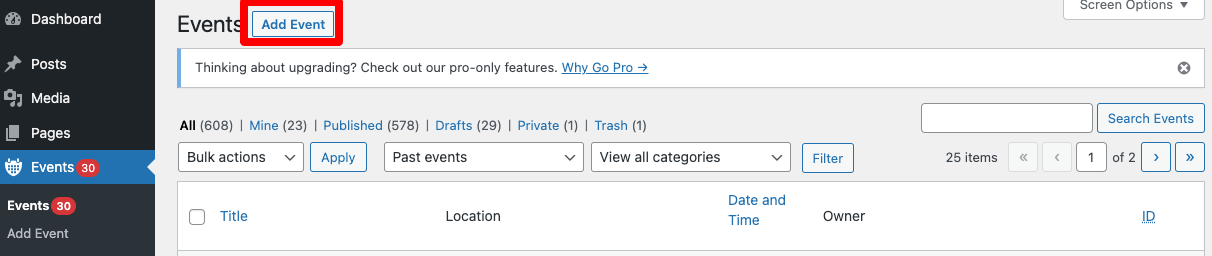
If you are instead creating a completely new event, you should use the Add Event button on the top of the Events management page.
Once you click it, you will be able to edit a page full of small forms and menus. We will go through them in this guide, and our suggested options. Please notice that if your browser window size is very small, you may not see the different forms in the same order we present them.
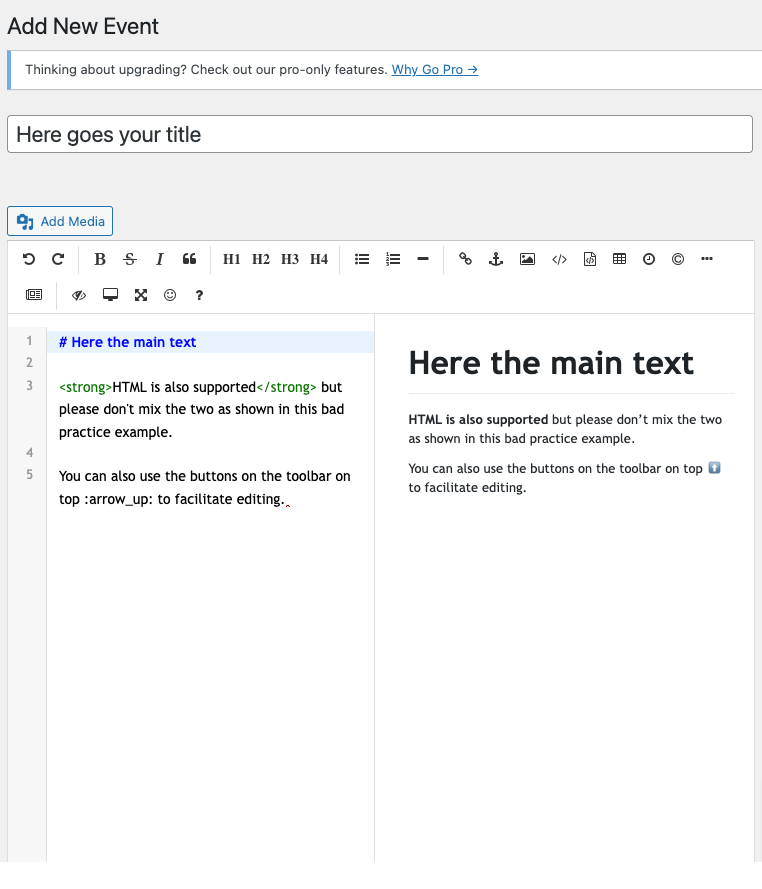
Please add a title to your event in the Title box on top. The main text presenting your event goes in the big textbox in the center of the page. The input box is on the left side, while the right side shows the rendered version of the text. The input box supports both Markdown and HTML format, but possibly don’t mix the two (or unexpected things might happen, like entire chunks of text disappear). There are a couple of (tool)boxes in the page (right-top corner, if your window is large enough) for converting HTML to Markdown and enabling/disabling Markdown editing, we suggest to leave those as they are and just edit directly in the format you prefer. Explaining Markdown goes beyond the purpose of this guide, if you feel you would need an introduction please check some online guide.
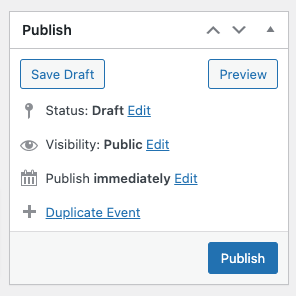
Before you scroll too much down, please notice the Publish box. This is the box through which you will make your event public (if you use the blue button), hence list it in the Upcoming courses table mentioned previously. If you would like to save your work but it is still not ready to be published, select Save draft. You can also Preview the last draft you saved to check how it will look like.
Also, please ignore the Event Tags box. Even if you add tags there, they won’t really be shown or influence the seach function in the website. Same applies to the Restrict this content box. You probably don’t want to restrict the visibility of your event anyway, even if internal only. This can be managed by having tickets only for internal people, rather than hiding the event to anyone.
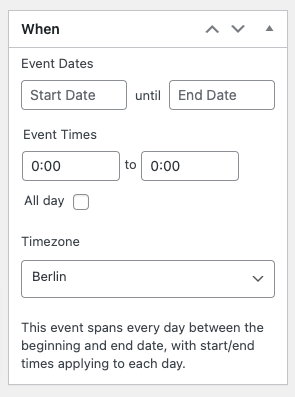
You can (and should) add details of when your course is going to happen through the When box. If you don’t add a future date, the event will not appear in the Upcoming courses table. Also, if possible avoid adding events that span multiple weeks. They tend to show up as contiguous blocks in the Bio-IT calendar. This is a limitation of the system and not something we can circumvent. Separate events would be a better option.
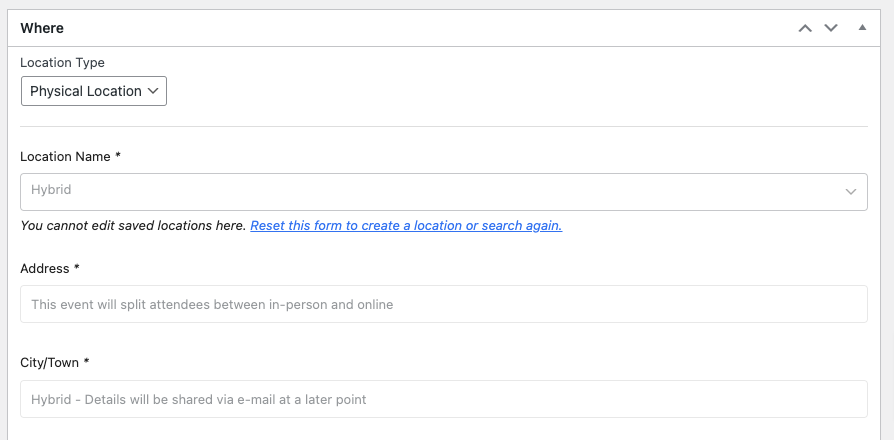
Similarly, you can specify Where the course will happen. Just start typing a Location Name in the related field, and it should be matched with our internal database. Notice that if you select Physical location, both the options Online and Hybrid are available. Possibly counterintuitive, but it will help us collecting data about how the courses are run.

When you add the (default) tag Course in the Event categories box and publish the event, it will be automatically announced in the Bio-IT-announce channel. If you don’t want to have it announced (e.g. if the registration is not yet open), select any other tag before making it public. If you leave it blank it will default to Course.
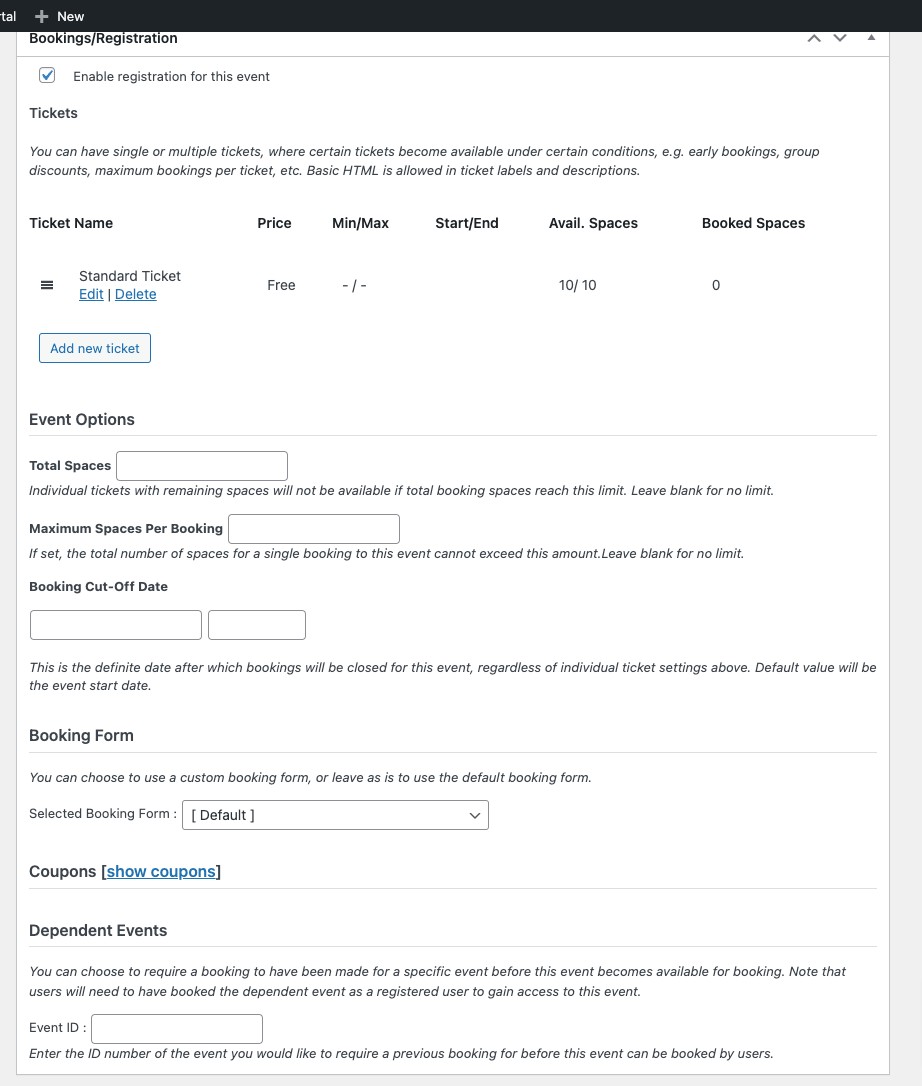
One of the most interesting features of the BIo-IT website is that it will support you in managing the registrations of your event. To use this feature, tick the Enable registration for this event option in the Bookings/Registration box. In the screenshot both the Tickets section (top) and the Booking Form (bottom) are visible. The Tickets section will change based on which tickets are made available. This is independent of which Booking form option you select, which will determine the conditions for registration. The Default form is the Bio-IT/Centers Courses one and this is how it looks like once the event is published:

Example: You plan to run an hybrid event and would like to keep it internal to EMBL staff. In this case, we suggest you create two types of tickets (online and in person tickets) to be able to easily differentiate between the two types of booking, and use a booking form that requests an EMBL email.
Frequently Asked Question: Do you want to create a Waiting list because you filled all your courses seats or you would like to have a prior Application before handing out tickets? You can manage this two exactly as if they were Tickets: just edit the ticket title, description and automatic email (see below) accordingly.
Please also ignore the Excerpt box and consider that the Author default is your user.
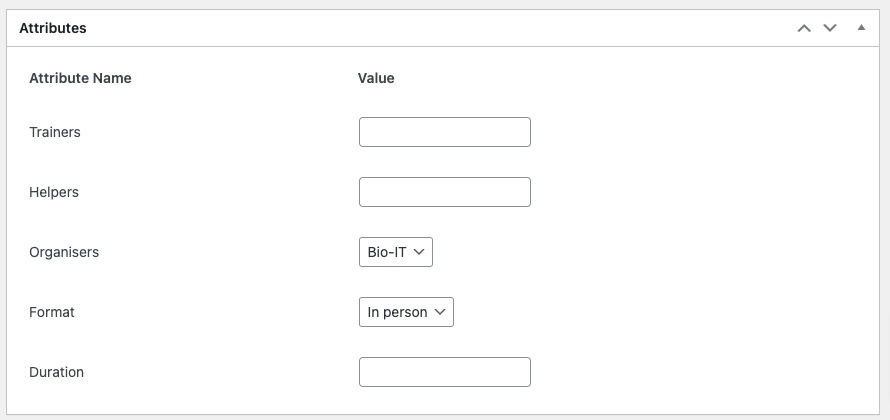
To better capture some metadata about our courses, we recently introduced the Attributes box. At the moment, most of these fields allow free text. We should discuss or agree on some conventions for fields such as Duration. For Trainers and Helpers please use , (comma space) to separate each name. Multiple names per-person are ok. We’ll add better visualization later on so trainer names show up consistently.
Also, feel free to use whichever order convention you find appropriate. We typically go with alphabetical order of first name. If your entity is not available among the Organiser options, let us know and we will add it.
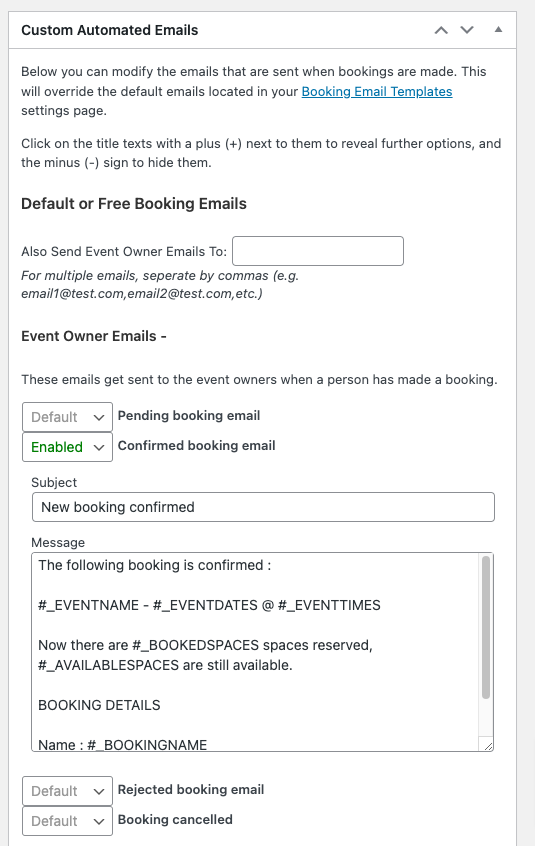
Once people register to your courses, an automatic email is sent to them. The automatic emails are customised through the Custom Automated Emails box. Only the website admins are able to modify the template, but you can modify the text of e.g. the confirmed booking email by selecting Event Owner Emails > Enabled Confirmed booking email and then editing the message or subject there.
We hope this is useful to allow you to advertise and manage training events through our website! Let us know if there are functionality you would like to be added and we will do our best in trying to meet your needs.
Happy training!